Don’t ignore that crack on the hull of your fiberglass boat, it may expand and lead to a hole. You need to fix it before it worsens. God knows what lies beneath that crack, maybe there already is a hole.
Fixing a hole in a fiberglass boat is not a very complex task. You need not be an expert or a professional, just a little skill on your part will do the job, and your lovely boat would be on the waters again.
Even a minor repair would seem to be a complicated process at first but when you plunge into it then you realize that it was not a big deal. All boat owners should be able to do these small repairs to keep their boats maintained and afloat.
Follow the steps discussed below and you’re all set to repair that ugly hole on your fiberglass boat.
How To Fix A Hole On A Fiberglass Boat
Material needed for the repair;
1. Fiberglass cloth
2. Fiberglass resin
3. Disposable paintbrushes
4. Acetone or any other solvent
5. 50-grit, 80-grit, and 100-grit sandpaper
6. Gel coat
Either you purchase a fiberglass boat repair kit that includes a fiberglass cloth, epoxy resin, a hardener, adhesive filler, brushes, and tools, or buy a fiberglass mat, a fiberglass resin along with a hardener separately.
Caution; Take safety precautions before attempting this repair. Wear safety glasses, a respirator, and gloves.
Fiberglass Cloth
Fiberglass cloth would be used to cover the hole and build up the thickness. It is a piece of cloth with fiberglass threads running in all directions. It is stronger than a fiberglass mat.
The threads or strands in a mat are smaller in size than in fiberglass cloth.
Fiberglass Resin
Fiberglass resin would be used for binding purposes. It will strengthen the fiberglass lay-up. There are two types of fiberglass resins available in the market. Both these adhesives are known for their different qualities.
1. Polyester resin
2. Epoxy resin
Polyester Resin
Epoxy’s adhering power is stronger than polyester as it can hold up to 2000 lbs per square inch whereas polyester resin is said to hold less than 500 lbs per square inch.
Polyester resin is mostly used for temporary repairs. It is cost-effective and dries up quickly which saves you time. Although, it also depends upon the temperature at which the repair is taking place.
Polyester resin would be a better choice if you’re fixing something temporarily and have limited time.
Epoxy Resin
Epoxy can withstand wearing and tearing more effectively as compared to polyester resin. Some of its formulas can even be used underwater as they can endure moisture.
Its binding power is far superior to polyester resin as mentioned above. However, it takes more time in curing than polyester and if you are short on time then it is a no-no. Another downside is its price, it is costlier than polyester.
If you’re doing some structural repair that needs to be strong enough then go for epoxy resin.
Disposable paint brushes
Either buy a fiberglass roller tool kit or purchase some disposable paintbrushes. You’ll need these brushes to moisten the fiberglass cloth with resin and then lay them on the damaged area.
Acetone or any other cleaning solvent
To clean the surface and wipe off the dust particles, you need a cleaning solvent. It can be acetone or any other cleaner of your choice.
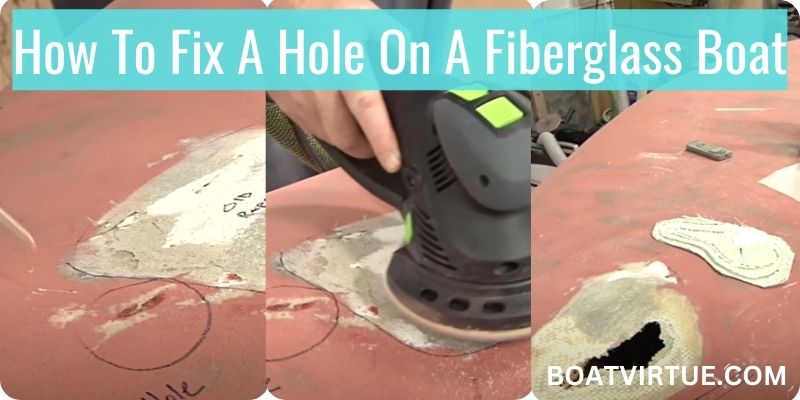
Sandpaper or power sander
A power sander would be required to bevel the edges of the hole prior to filling up the gap. You would need 50 grit, and 80 grit sandpaper for the initial sanding of the surface and 100 grit for a later smoother surface.
Gel coat
Finally, a tinted gel coat would be used to give the place a finished look. Gel coats are essential for fiberglass boats. They give strength, durability, and luster to the boat.
Steps To Fix A Hole On A Fiberglass Boat
To fix the fiberglass boat hole, follow the steps mentioned below.
1-Preparing The Surface
First of all, examine the hole and its size, how bad is the damage? Is it a crack or a hole? Is it a thru-hull hole? After taking note of the size, mark out the damaged area with a black marker.
Ensure the marked area should be a few inches bigger than the original hole. The next step would be to prepare the surface.
Start by grinding the sides of the hole so that no sharp edges are left. The sides of the hole are required to be beveled as it will help you in filling up the depth.
Use a power sander with a 50-grit sanding disc to do the task. Now clean the entire surface. Soak a piece of cloth with acetone and wipe off the work area with it.
The place should be clean enough so that the fiberglass resin sticks to it properly. ( Acetone is highly flammable, take extra caution while using it.)
2-Fiberglass Patch
Now prepare a fiberglass patch. You’ll have to build up fiberglass in layers. Lay the entire fiberglass cloth on the hole and mark the hole on it with a black marker.
The patch should only cover the hole. Cut that piece of fiberglass mat and place it aside. Now cut another piece that should be half-inch bigger than the original piece and put it aside.
Likewise, cut out 5 to 6 fiberglass cloth pieces. Every other piece should be bigger from all sides than the original fiberglass mat piece that was cut according to the size of the hole.
In this way, you’ll get a piece that will cover the hole, the other piece would be slightly bigger from all sides. The next piece would be even bigger. The last piece would cover the entire damaged area till the beveled sides.
3-Preparing The Resin
Next, prepare your binding agent. Select the resin, whether you want to use polyester or epoxy resin. Read all the instructions and warnings given on the package.
Usually, a hardener comes with the resin and the mixing ratio is also mentioned on the package. Follow the instructions and do not try to change this ratio to reduce its setting time.
Pour the epoxy resin into a clean bucket, then pour the measured hardener into it. The ratio is generally 2:1, two parts resin and one part hardener.
Now mix them together with a clean stick. Your epoxy resin is ready to be dispensed.
4-Filling up the Gap
If the hole you’re working on is a through-hull hole, then you’ll need some support at the other end of the hole, otherwise, your fiberglass patch would fall into that void.
Step 1: Take a piece of cardboard that fits on the other side of the hole, and stick it using masking tape. Now it’s time to soak the fiberglass patches in epoxy resin.
Take the smallest patch and brush the resin onto it, and apply the resin on both sides. The patch should be saturated with the liquid.
Step2: Soak the next patch which is slightly bigger than the previous one and place the saturated patch on the smaller piece. In this way prepare your fiberglass patch.
Saturate all the pieces completely in the liquid, the resin should not overflow but the pieces should be thoroughly drenched in it.
Place all the patches on one another in a way that the smallest one is at the bottom and the largest one is at the top. All the patches would be embedded into each other and become a single piece.
Step3: Apply a coat of resin on the affected area and lay that saturated fiberglass patch on the hole. The smallest patch should be facing the hole.
Do not shove it into the hole, slightly press it with the brush and cover it with a thin layer of resin. Allow this layer to be cured. It would depend on the temperature of the place. Warmer temperatures would decrease the setting time.
5-Sand The Surface
After the patch has been cured properly, sand it with an 80-grit sanding disc to roughen the surface so that it can take on another layer.
Repeat the process by wiping off the entire place with a piece of cloth dipped in acetone to remove all the dust particles.
Now build up some thickness by brushing a coat of resin on the depression and start putting smaller pieces of fiberglass cloth wet with the epoxy resin in that gap.
Look out for air bubbles if any and smooth out the surface with a roller or a brush. No void should be left untouched. Fill in the whole place with these pieces.
Gradually increase the size of the cloth. A final patch would cover the entire spot. Again you need to wait for the layer to get hardened. Sand it again after the layer has been cured.
This time use a 100-grit sanding disc to even out the surface. At this stage, you can also use a fiberglass Bondo filler which is easily available from the market and gives a finished look to the affected area.
Apply a thin layer of Bondo and let it dry. After it has dried sand it again. Don’t go too deep in the layers, the motive here is just to prepare the surface for the Gel coat.
6-Gel Coat
The hole on your fiberglass boat has been repaired and is ready for gel coat. Mix gel coat and methyl ethyl ketone peroxide (MEKP), a hardener in a clean bucket. Add a pigment that matches your boat’s color.
Next, mix them all. Read the instructions on the product and keep the mixing ratio accordingly.
Apply a layer of gel coat on the affected area using a brush and let it dry.
When dried, apply another coat and allow it to dry. Three coats would be enough. Each coat would need 3 to 4 hours to be fully cured.
Sand the surface using a10000 grit sandpaper, after the final coat has fully dried. Finally, wipe away the surface with a cleaning solvent.
Voila, Your boat is ready.
Conclusion
The process of fixing a hole in a fiberglass boat may seem to be onerous at first but with the right tools and appropriate guidance, it would be a piece of cake. Although a bit time-consuming but the outcome is worth it. Your boat would be repaired to your satisfaction.